Policies
Managing Policies
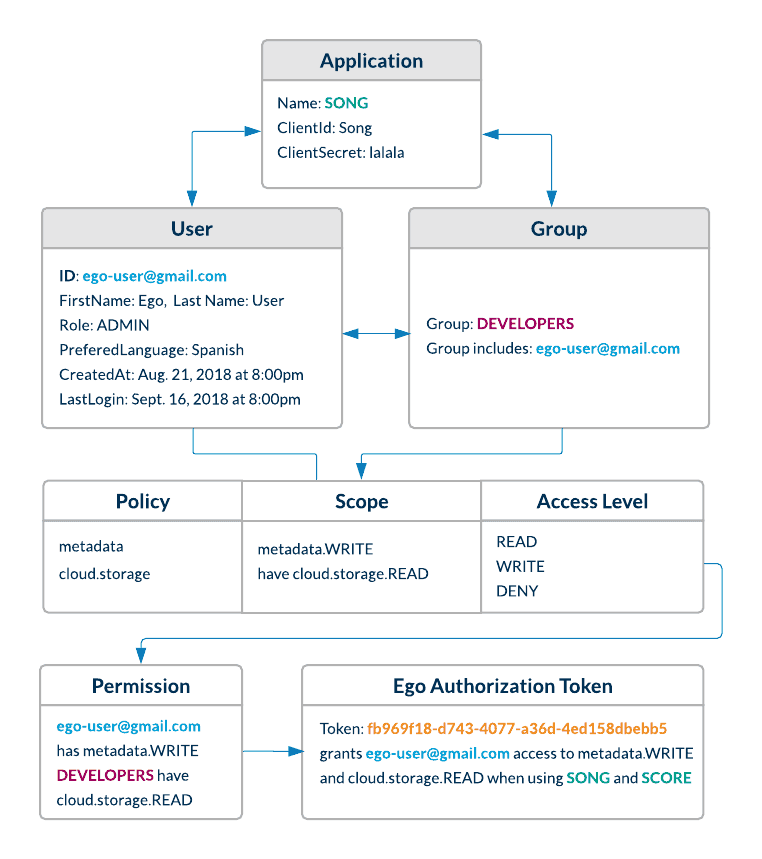
A policy defines a scope or context within which an application may grant READ/WRITE/DENY permissions to a user or group. The available permissions are:
READ: Grants read-only access to a resource.WRITE: Grants read and write access to a resource.DENY: Denies access to a resource.
Policies provide flexibility in configuration, enabling administrators to specify the permissions a policy grants and to which entities (users or groups).
Permission Inheritance
Before proceeding, it is important to understand how permissions are inherited:
Note that a user can have permissions assigned directly to their profile (user ID), while also inheriting permissions from the groups they belong to. In case of seemingly conflicting permissions between a user's profile and their group, the resolution is based on the strictness of the actual permissions (READ/WRITE/DENY). The least-permissive permission takes precedence. For example:
- User ID
abc123is directly assignedSONG.WRITEpermission. - User
abc123also belongs to groupTestGroup, which is assignedSONG.DENYpermission.
Here, the more restrictive SONG.DENY permission from TestGroup overrides the SONG.WRITE permission directly assigned to user abc123.
Note that the Ego API offers two distinct endpoints for retrieving user-level permissions:
users/{id}/permissions: Returns permissions directly assigned to the user.users/{id}/groups/permissions: Returns the resolved permissions, taking into account both direct permissions and group permissions.
NOTE: In the Ego Admin UI, when viewing a user's permissions on their details pane, only the resolved permissions are displayed.
Creating a Policy
To create a new policy:
Click Policies from the left-hand menu, then click Create in the right-hand panel.
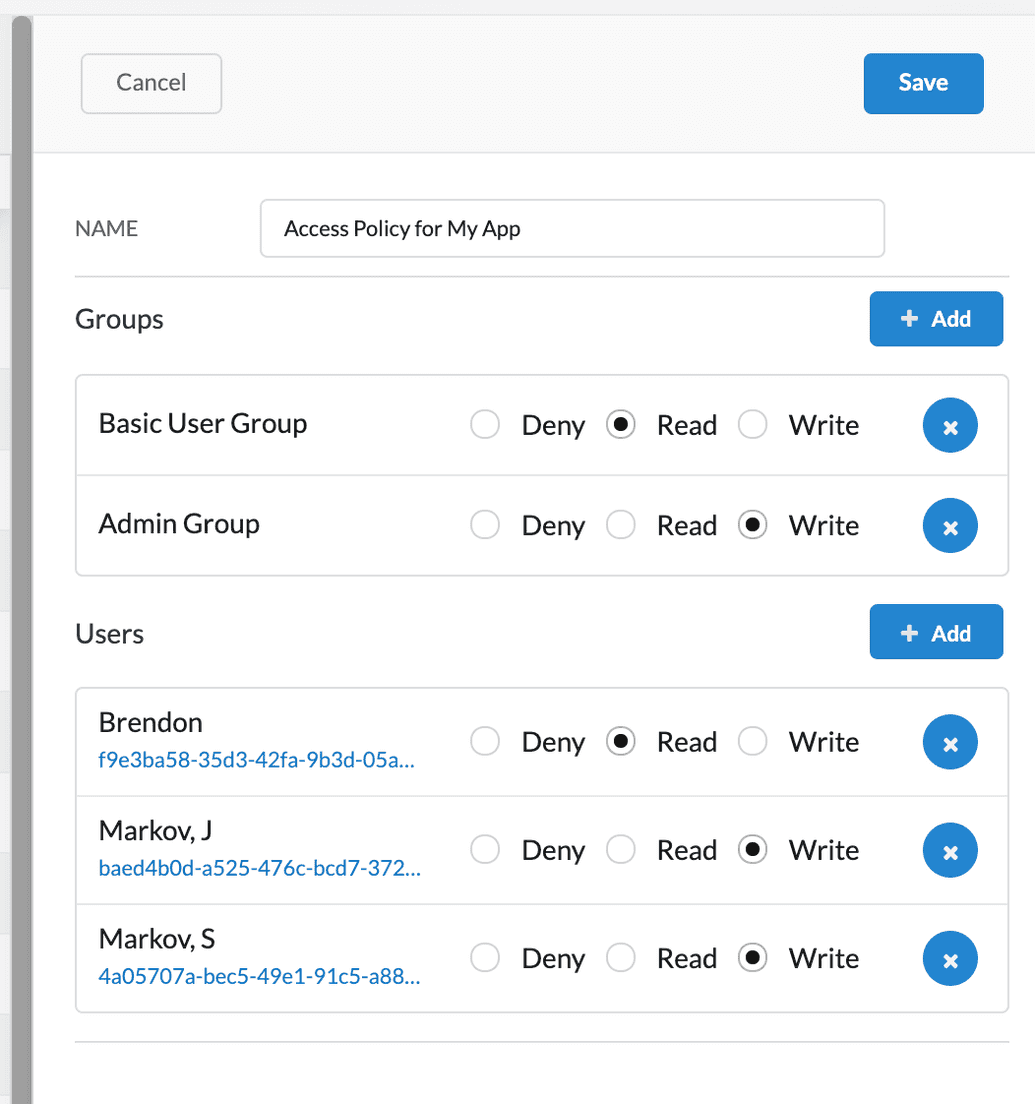
The policy fields appear in the right-hand panel. Populate them as follows:
| Field | Description |
|---|---|
| Name | Descriptive name for your policy |
| Groups | Use the + Add button to add existing groups and specify their access level (READ, WRITE, or DENY). To remove a group, click X next to the group. |
| Users | Use the + Add button to add existing users and specify their access level (READ, WRITE, or DENY). To remove a user, click X next to the user. |
- Click Save. The policy is created, and the specified users and groups are granted the designated permissions.
Editing a Policy
To edit a policy:
Click Policies from the left-hand menu, then click the policy you want to edit from the policies table.
The policy's details pane is displayed on the right. Click Edit and modify the fields as required. The fields are the same as described earlier in Creating a Policy.
Deleting a Policy
To delete a policy:
Click Policies from the left-hand menu, then click the policy you want to delete from the policies table.
The policy's details pane is displayed on the right. Click Delete. You will be asked to confirm the deletion.
NOTE: Before deleting a policy, ensure this is your intended action, as it cannot be reversed. You can manually re-create the policy if needed, but the details will be lost.

