Testing Data Upload
After you have completed all post-deployment verification and configuration, the DMS platform is ready for use.
Here we will demonstrate and test a simple, end-to-end data upload. We will use demo data available with the DMS to submit data, index it, configure it for display, and finally explore that data in the Data Portal.
Configure User Permissions in Ego
First we must configure the correct permissions in Ego to allow us to execute data upload operations.
This configuration should have been completed during your post-deployment verification and configuration, but we will double-check.
- Log into Ego UI with the original admin user you created by going to:
| Mode | URI |
|---|---|
| Local | http://localhost:<port>/ego-ui |
| Server | https://<myDomain>/ego-ui |
Where:
<port>is the port on which you have deployed the DMS Gateway in local mode<myDomain>is the registered domain you configured for the DMS Gateway (e.g.dms.test.cancercollaboratory.org)
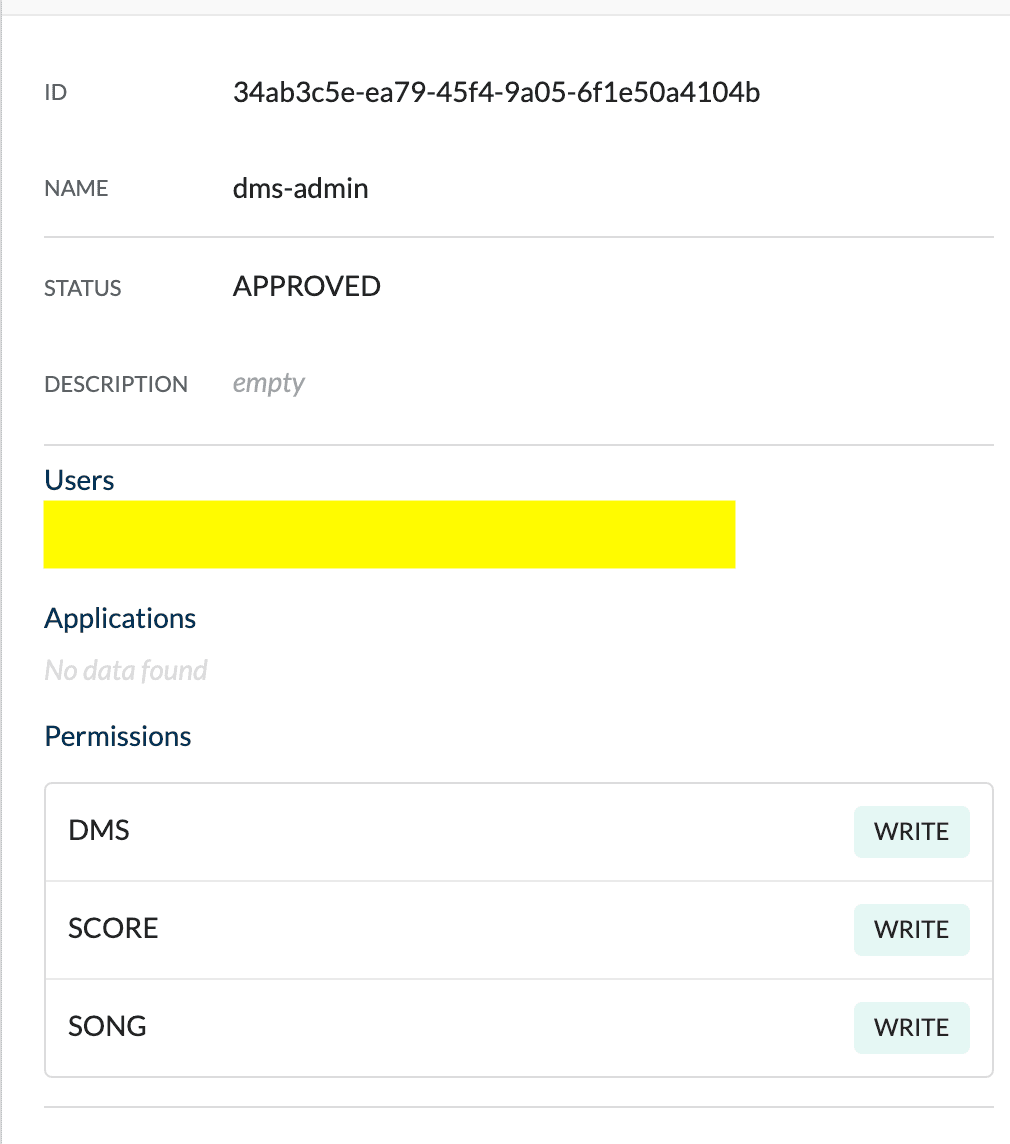
- From the left navigation, click Groups and verify that the
dms-admingroup has been created and is assigned these permissions:DMS.WRITE,SONG.WRITE,SCORE.WRITE. These permissions are required to perform certain data upload operations:
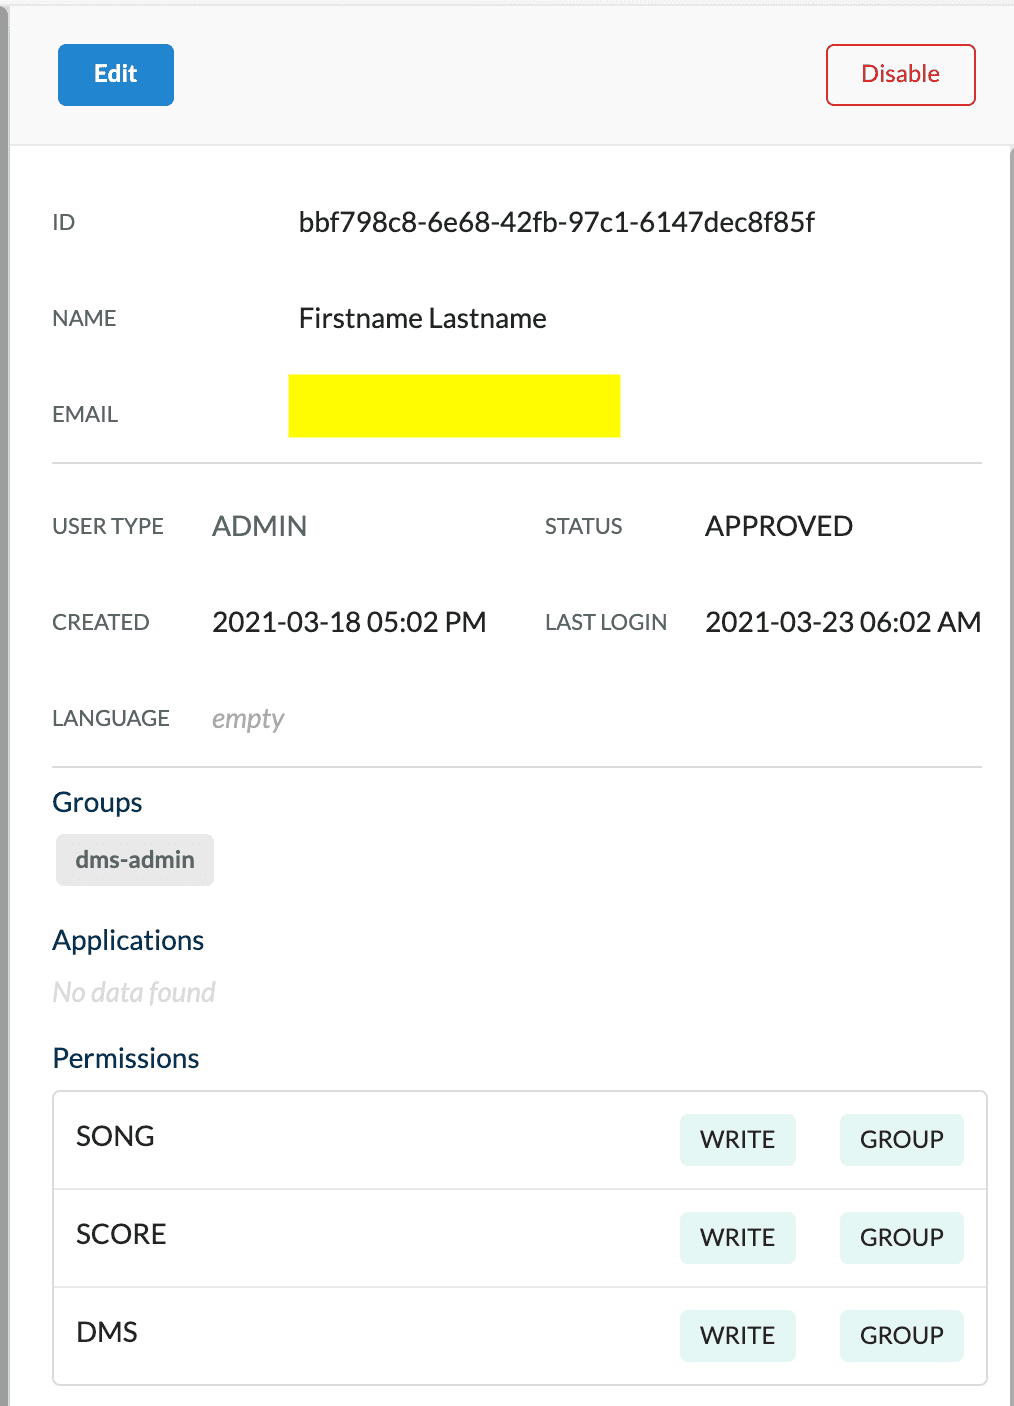
- From the left navigation, click Users and verify that your user was created with USER TYPE =
ADMIN, is assigned thedms-admingroup, and has these permissions:DMS.WRITE,SONG.WRITE,SCORE.WRITE
Generate API Key in DMS UI
Now that you have verified your user has the correct permissions, we can generate our API Key directly from the DMS UI (Data Portal) itself. The API Key is used for all subsequent operations with the various Overture service APIs you will interact with.
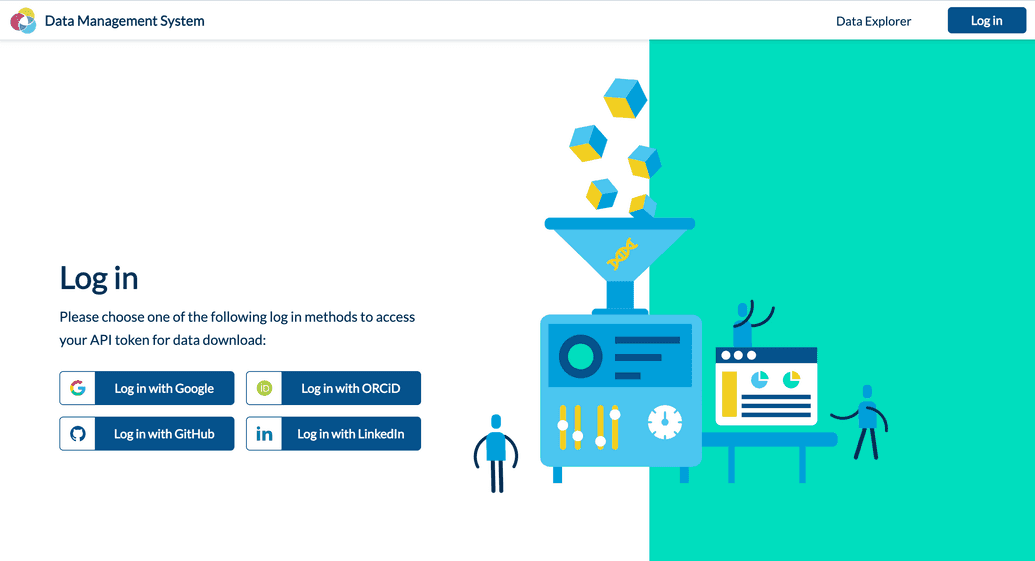
- Log into DMS UI with the original admin user you created by going to:
| Mode | URI |
|---|---|
| Local | http://localhost:<port>/dms-ui |
| Server | https://<myDomain> |
Where:
<port>is the port on which you have deployed the DMS Gateway in local mode<myDomain>is the registered domain you configured for the DMS Gateway (e.g.dms.test.cancercollaboratory.org)
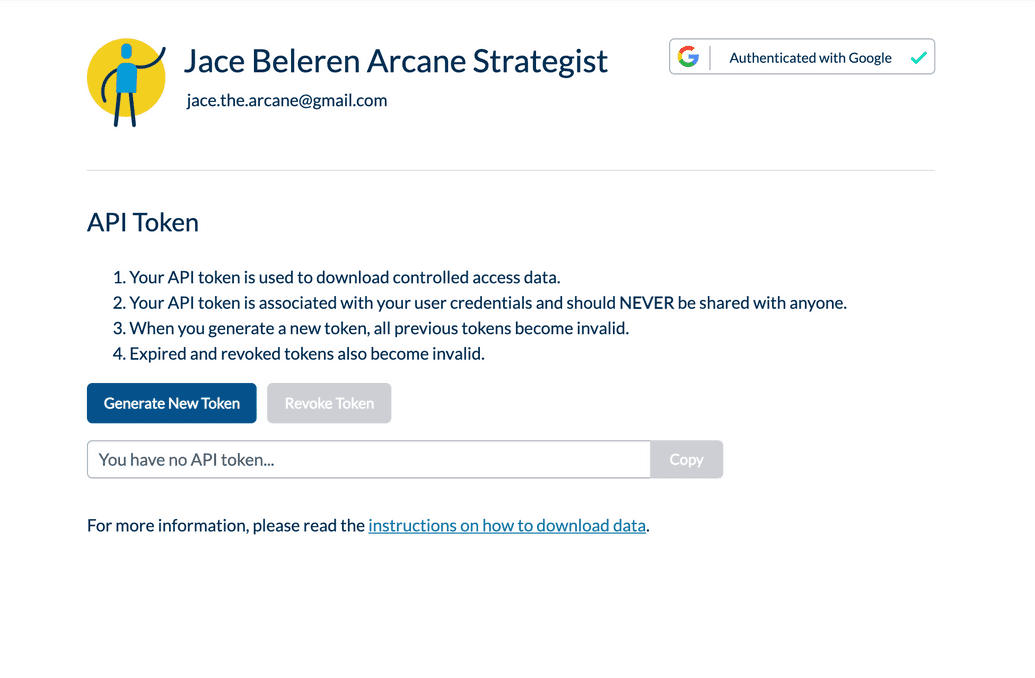
- Click your name in the top-right in the header and select Profile & Token. Your profile is displayed showing your name (as captured from your identity provider), your contact email (as captured from your identity provider), and the identity provider that you have logged in with:
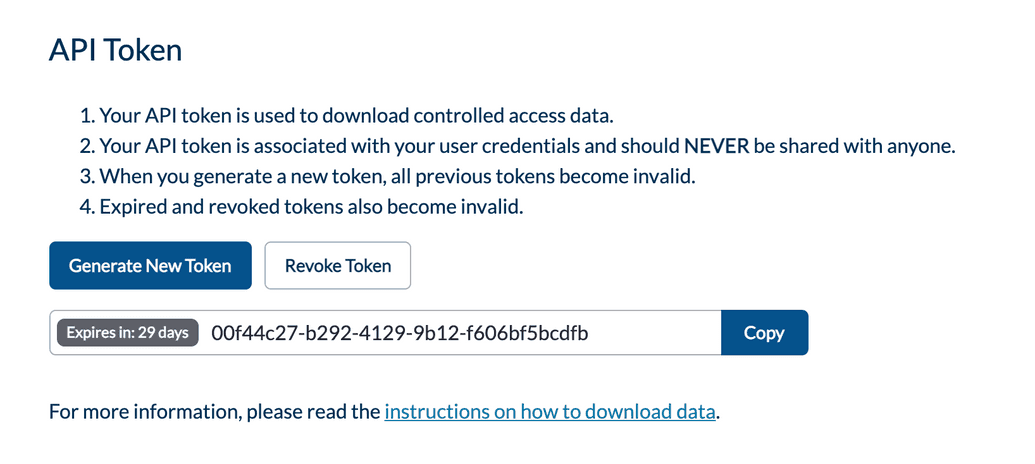
- Click Generate Token. A new token is generated, with its validity period (in days) displayed to its left. Record and remember your token value and keep it safe and secure. You can easily copy the value to your clipboard by clicking the Copy button:
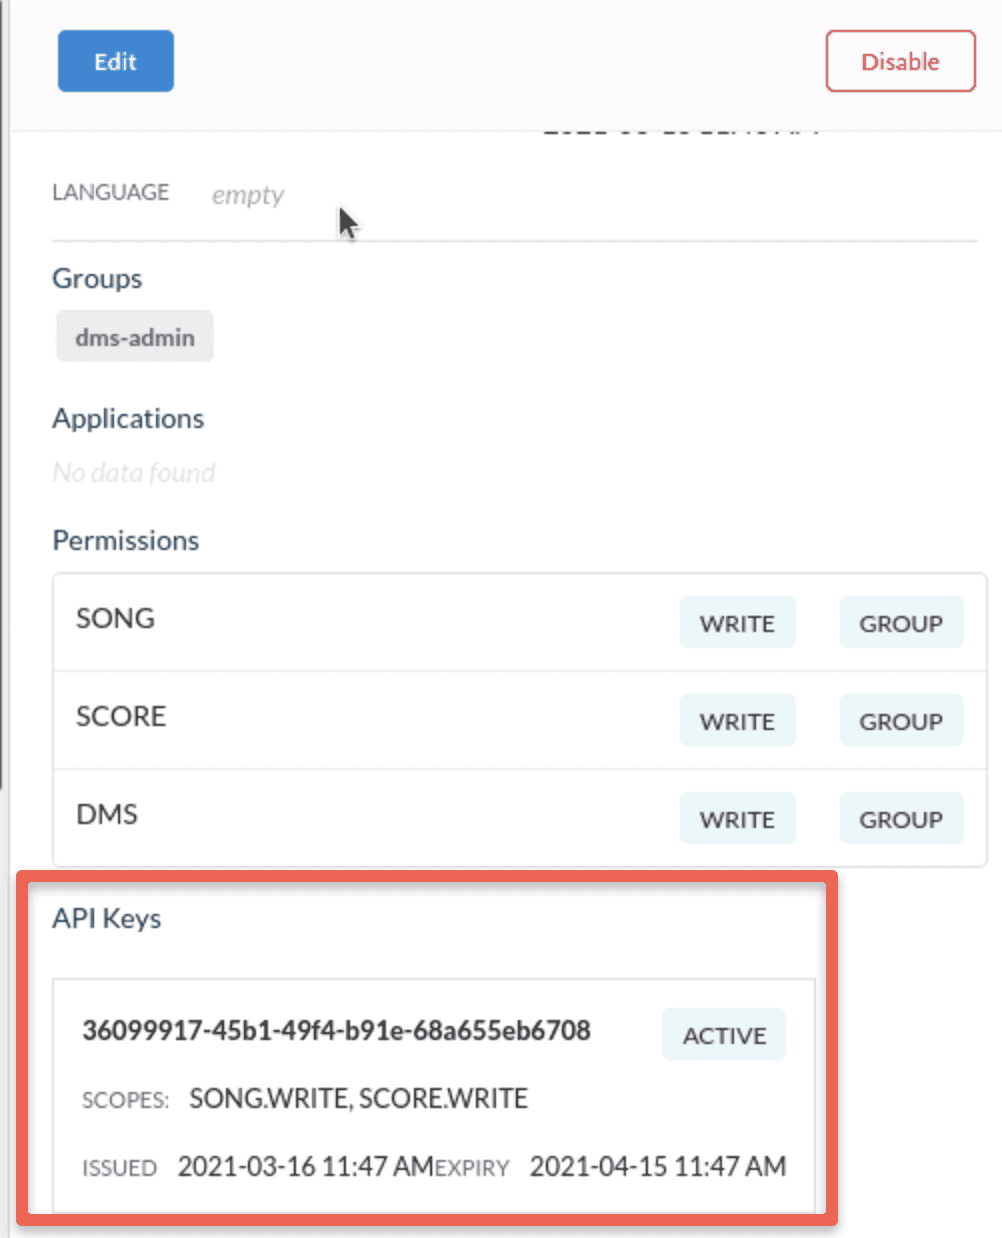
- Log back into Ego UI, navigate back to your user profile, and verify that under
API Keysthe newly-generated token now appears with anACTIVEstate and the correctSCOPES(permissions):
Create Study in Song
Next, we must create a study in Song. The concept of a study is used to group data that belongs together and must be submitted and indexed together.
Moving forward, we will use a set of sample data prepared for a test study with the ID, ABC123.
Create Study Using cURL
To create your study via cURL:
Open a command-line terminal session.
Enter the following command:
curl -X POST "http://<url>/song-api/studies/ABC123/" -H "accept: */*" -H "Authorization: bearer <API KEY>" -H "Content-Type: application/json" -d "{ \"description\": \"string\", \"info\": { }, \"name\": \"string\", \"organization\": \"string\", \"studyId\": \"ABC123\"}"
Enter the <url> based on your deployment mode:
| Mode | URL |
|---|---|
| Local | http://localhost:<port> |
| Server | https://<myDomain> |
Where:
<port>is the port on which you have deployed the DMS Gateway in local mode<myDomain>is the registered domain you configured for the DMS Gateway (e.g.dms.test.cancercollaboratory.org)
For <API KEY>, enter the API Key you genereted earlier.
Leave description, info, name, organization blank (can be filled in optionally if you want).
Create Study Using Swagger UI
To create your study via the Swagger UI:
- Go to the Song API's Swagger UI:
| Mode | URL |
|---|---|
| Local | http://localhost:<port>/song-api/swagger-ui.html |
| Server | https://<myDomain>/song-api/swagger-ui.html |
Where:
<port>is the port on which you have deployed the DMS Gateway in local mode<myDomain>is the registered domain you configured for the DMS Gateway (e.g.dms.test.cancercollaboratory.org)
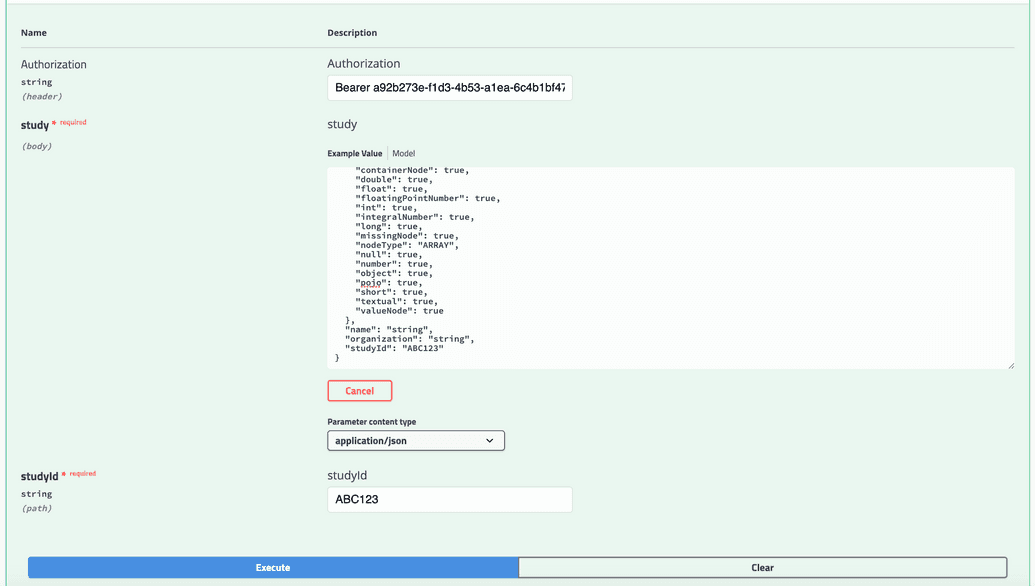
- Under Study click the
POST /studies/{studyId}/ CreateStudyendpoint.
- Click Try it out.
- Click the Authorize button in the top right.
- Under Authorization, enter the
Bearer <API Key>and click Authorize, where<API Key>is the API Key value you generated earlier.
- In the study body, in the
studyIdfield, replace"string"with"ABC123".
- In the
studyIdfield, enterABC123.
- Click Execute. For example:
Verify Study Created
If successful, either the cURL command or the Swagger UI will return a successful response indicating the study is created in Song:
{"message": "Successfully created study 'ABC123'"}
Download and Configure Song Client
Next, you must download and configure the Song client. This command-line client is used for various metadata operations such as submitting analyses, creating file manifests for Score, and so on. To understand how to use Song in more detail, see here.
- Download and unzip the latest Song client from here or do so from your terminal command line, then switch to the unzipped directory:
$ wget -O song-client.tar.gz https://artifacts.oicr.on.ca/artifactory/dcc-release/bio/overture/song-client/[RELEASE]/song-client-[RELEASE]-dist.tar.gz$ tar xvzf song-client.tar.gz$ cd song-client-<latest-release-number>
- Open the
song-client/<latest-release-number>/conf/application.yamlfile and edit the client section as follows:
Set serverUrl based on your deployment mode:
| Mode | URL |
|---|---|
| Local | http://localhost:<port>/song-api |
| Server | https://<myDomain>/song-api |
Where:
<port>is the port on which you have deployed the DMS Gateway in local mode<myDomain>is the registered domain you configured for the DMS Gateway (e.g.dms.test.cancercollaboratory.org)
Set studyId to ABC123 (the study for which you will be submitting data).
Set accessToken to the API Key you recorded earlier via DMS UI.
For example:
client:serverUrl: http://localhost:80/song-apistudyId: ABC123programName: singdebug: falseaccessToken: 36099917-45b1-49f4-b91e-68a655eb6708
- Save your changes.
Download and Configure Score Client
Next, you must download and configure the Score client. This command-line client is used to upload and download data files to and from your configured object storage service. To understand how to use Score in more detail, see here.
- Download and unzip the latest Score client from here or do so from your terminal command line, then switch to the unzipped directory:
$ wget -O score-client.tar.gz https://artifacts.oicr.on.ca/artifactory/dcc-release/bio/overture/score-client/[RELEASE]/score-client-[RELEASE]-dist.tar.gz$ tar xvzf score-client.tar.gz$ cd score-client-<latest-release-number>
- Open the
score-client/<latest-release-number>/conf/application.propertiesfile and edit the client section as follows:
Set accessToken to the API Key you recorded earlier via DMS UI.
Uncomment metadata.url and set it based on your deployment mode:
| Mode | URL |
|---|---|
| Local | http://localhost:<port>/song-api |
| Server | https://<myDomain>/song-api |
Uncomment storage.url and set it based on your deployment mode:
| Mode | URL |
|---|---|
| Local | http://localhost:<port>/score-api |
| Server | https://<myDomain>/score-api |
Where:
<port>is the port on which you have deployed the DMS Gateway in local mode<myDomain>is the registered domain you configured for the DMS Gateway (e.g.dms.test.cancercollaboratory.org)
For example:
# The access token for authorized access to dataaccessToken=36099917-45b1-49f4-b91e-68a655eb6708# The location of the metadata service (SONG)metadata.url=http://localhost:80/song-api# The location of the object storage service (SCORE)storage.url=http://localhost:80/score-api
- Save your changes.
Submit Analysis to Song
Next, we must submit an analysis to Song. All submitted data must be associated to some type of analysis registered with Song. For demonstration purposes here, we will simply submit a default analysis type that is already pre-registered out-of-the-box, variantCall. If you wish to learn how to register your own analysis type schemas, please see the detailed Song documentation.
For our example, we will submit data for a single variant call JSON file:
- Download this sample JSON and place it in a directory of your choosing. Remember this directory as it will be used in subsequent operations.
- Download these accompanying input VCF files and place them in a directory of your choosing. Remember this directory as it will be used in subsequent operations:
- Switch to your home directory and from there, submit the analysis by executing the Song client with this command:
$ ./song-client-<latest-release-number>/bin/sing submit -f ./<directory>/exampleVariantCall.json
Where <directory>is the path to where you have stored the JSON file downloaded earlier.
- If successful, an Analysis ID is returned and displayed. Record this as you will need it for subsequent operations:
{"analysisId" : "2bfc131a-0d5c-4011-bc13-1a0d5c101184","status" : "OK"}
Create Manifest for Score
Now that the analysis has been submitted, we must create a manifest so that the input data files that you downloaded earlier can be uploaded to your object storage service via Score:
- Switch to your home directory and from there, create a manifest by executing the Song client with this command:
$ ./song-client-<latest-release-number>/bin/sing manifest -a <ANALYSIS ID> -f <outputDirectory>/manifest.txt -d <submittingFilesDirectory>
Where:
<ANALYSIS ID>is the Analysis ID you captured earlier from submitting an analysis to Song<outputDirectory>is the directory where you want the generated manifest to be created<submittingFilesDirectory>is the directory where you have stored the raw data files to upload to score
- If successful, the manifest file will be created in the specified output directory:
Wrote manifest file './song/manifests/manifest.txt' for analysisId '2bfc131a-0d5c-4011-bc13-1a0d5c101184'
- Switch to the manifest output directory and make sure the file exists, then examine its contents to check that it lists the correct input files:
$ cat manifest.txt$ 2bfc131a-0d5c-4011-bc13-1a0d5c101184a7612d76-37ec-57ad-92d9-51fb44a70e07 /home/ubuntu/song/input-files/example.vcf.gz.idx c03274816eb4907a92b8e5632cd6eb81ec619aaf-0150-5b5e-b5ec-b6fc9c7f1769 /home/ubuntu/song/input-files/example.vcf.gz 9a793e90d0d1e11301ea8da996446e59
Upload Data via Score
With the manifest generated, use it to upload your raw data files to score:
- Switch to your home directory and from there, initiate an upload by executing the Score client with this command:
$ ./score-client-<latest-release-number>/bin/score-client upload --manifest ./<directory>/manifest.txt
Where <directory> is where you previously generated and stored the manifest file.
- If successful, each file in the manifest will be 100% uploaded, and the score-client will indicate the upload has completed:
Uploading object: '/home/ubuntu/songdata/input-files/example.vcf.gz.idx' using the object id e98daf88-fdf8-5a89-9803-9ebafb41de94100% [##################################################] Parts: 1/1, Checksum: 100%, Write/sec: 1000B/s, Read/sec: 0B/sFinalizing...Total execution time: 3.141 sTotal bytes read : 0Total bytes written : 24Upload completedUploading object: '/home/ubuntu/songdata/input-files/example.vcf.gz' using the object id 440f4559-e905-55ec-bdeb-9518f823e287100% [##################################################] Parts: 1/1, Checksum: 100%, Write/sec: 7.8K/s, Read/sec: 0B/sFinalizing...Total execution time: 3.105 sTotal bytes read : 0Total bytes written : 52Upload completed
Publish Analysis
Once the input files are uploaded, you can finally publish your analysis so that it can be indexed into Elasticsearch and consumed by downstream Overture services.
- Switch to your home directory and from there, publish the analysis by executing the Song client with this command:
$ ./song-client-<latest-release-number>/bin/sing publish -a <ANALYSIS ID>
Where <ANALYSIS ID> is the Analysis ID you captured earlier from submitting an analysis to Song.
- If successful, the Song client will indicate that the analysis is successfully published:
AnalysisId 3ecae260-db0e-450d-8ae2-60db0e950d15 successfully published
Index Study via Maestro
Now that the study is published, its data must be indexed into Elasticsearch so it can be consumed by Arranger and the DMS UI. Indexing is done via the Maestro service.
Index Study Using cURL
To create your study via cURL:
Open a command-line terminal session.
Enter the following command:
curl -X POST "http://<url>/maestro/index/repository/<repositoryCode>/study/<studyId>" -H "accept: */*" -d ""
Enter the <url> based on your deployment mode:
| Mode | URL |
|---|---|
| Local | http://localhost:<port> |
| Server | https://<myDomain> |
Where:
<port>is the port on which you have deployed the DMS Gateway in local mode<myDomain>is the registered domain you configured for the DMS Gateway (e.g.dms.test.cancercollaboratory.org)
For studyId, enter the Study ID you created earlier (e.g. "ABC123").
For repositoryCode, this must be set to song.overture.
Index Study Using Swagger UI
To index your study via the Swagger UI:
- Go to the Maestro API's Swagger UI:
| Mode | URL |
|---|---|
| Local | http://localhost:<port>/maestroi/api-docs |
| Server | https://<myDomain>/maestroy/api-docs |
Where:
<port>is the port on which you have deployed the DMS Gateway in local mode<myDomain>is the registered domain you configured for the DMS Gateway (e.g.dms.test.cancercollaboratory.org)
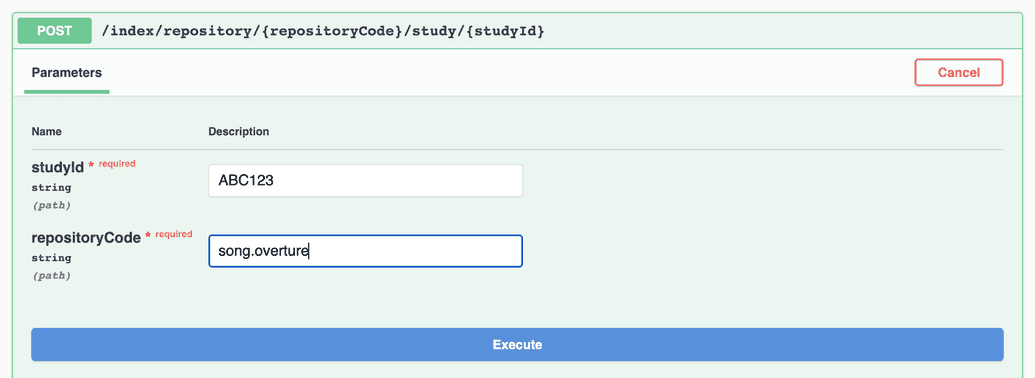
Under management-controller, click the
POST /index/repository/{repositoryCode}/study/{studyId}endpoint.Click Try it out.
- In
studyId, enterABC123, the study you created earlier.
- In
repositoryCode, you must entersong.overture.
- Click Execute. For example:
Verify Study Indexed
If successful, either the cURL command or the Swagger UI will return a successful response indicating the study is created in Song:
[{"indexName": "file_centric_1","failureData": {"failingIds": {}},"successful": true}]
Verify the Data in the Portal
Finally, we can visit the DMS UI (Data Portal) to explore our data and verify that the submitted data for our new study now appears in the Portal.
- Open your browser and, depending on your deployment mode, navigate to the DMS UI by going to:
| Mode | URI |
|---|---|
| Local | http://localhost:<port>/dms-ui |
| Server | https://<myDomain> |
Where:
<port>is the port on which you have deployed the DMS Gateway in local mode<myDomain>is the registered domain you configured for the DMS Gateway (e.g.dms.test.cancercollaboratory.org)
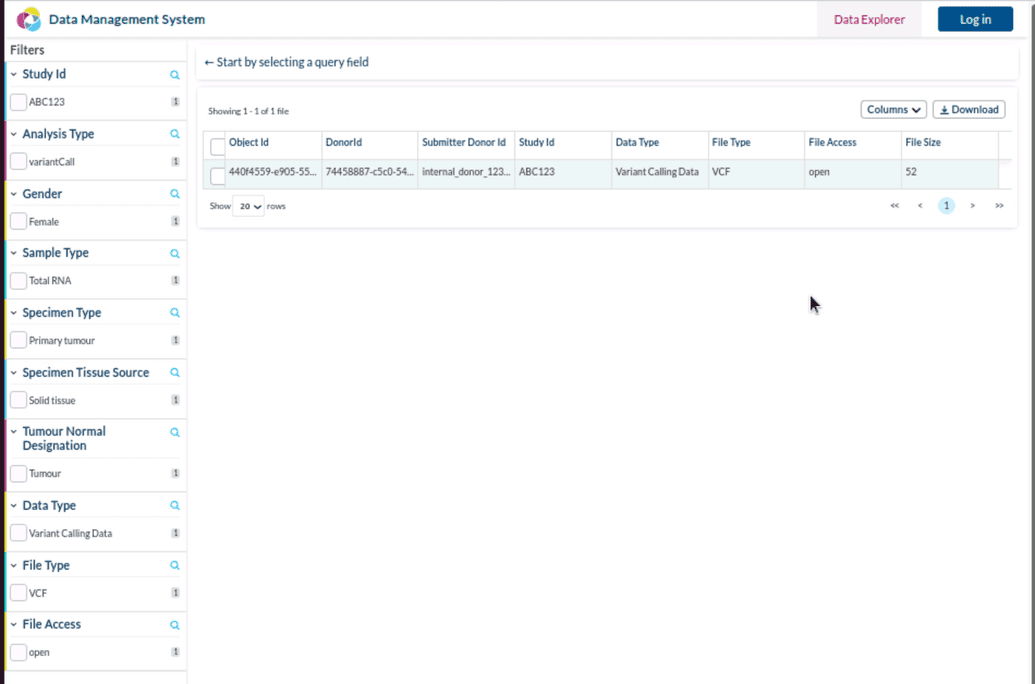
- Click Data Explorer.
- Observe that the single analysis file (VCF) we registered, uploaded, and published now appears in the UI! Congratulations, you have successfully completed and end-to-end data upload with the DMS platform!
For detailed instructions on how to use the Data Portal, see here.
